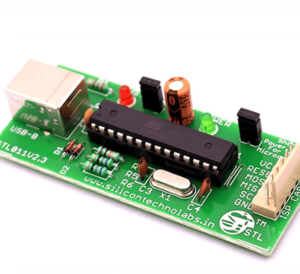
Introduction to 8051 Microcontroller
The 8051 microcontroller, developed by Intel in 1980, has been a staple in the world of embedded systems due to its simplicity, robustness, and versatility. This guide aims to provide a thorough understanding of the 8051 microcontroller, its features, and how to get started with it in your projects.
Features of 8051 Microcontroller
The 8051 microcontroller comes with a range of features that make it an ideal choice for many embedded applications. Some of the key features include:
- 8-bit CPU: The 8051 has an 8-bit central processing unit, making it suitable for various control-oriented applications.
- On-Chip Memory: It includes 4KB of ROM and 128 bytes of RAM, providing sufficient storage for small programs and data.
- I/O Ports: The 8051 has four parallel I/O ports (P0, P1, P2, and P3), each consisting of 8 bits, allowing for versatile input and output operations.
- Timers/Counters: Two 16-bit timers/counters are available for timing operations and event counting.
- Serial Communication: A full-duplex UART (Universal Asynchronous Receiver/Transmitter) is provided for serial communication.
- Interrupts: Five interrupt sources (two external, two timer, and one serial) are supported for handling multiple events.
Setting Up the 8051 Microcontroller
To get started with the 8051 microcontroller, you will need the following components and tools:
- 8051 Development Board: A board that includes the 8051 microcontroller and necessary peripheral components.
- Strømforsyning: A regulated power source to power the development board.
- Programming Device: A programmer or USB-to-serial converter to upload code to the microcontroller.
- Development Environment: Software tools like Keil uVision, Proteus, or other IDEs for writing and debugging code.
- Breadboard and Jumper Wires: For prototyping and testing circuits.
Step-by-Step Setup:
- Connect the Development Board: Connect the 8051 development board to your computer using the programming device.
- Install Drivers: Ensure that the necessary drivers for the programming device are installed on your computer.
- Set Up the Development Environment: Install and configure your chosen development environment (e.g., Keil uVision).
- Write and Upload Code: Create a simple program, compile it, and upload it to the 8051 microcontroller.

Programming the 8051 Microcontroller
Programming the 8051 microcontroller typically involves writing code in assembly language or C. Here’s a basic example of how to program the 8051 using the Keil uVision IDE:
Using Keil uVision:
- Create a New Project: Open Keil uVision and create a new project. Select the target device (8051 microcontroller).
- Write Code: Write your program in C or assembly language. Here’s a simple “Hello, World!” example in C:#include <REGX51.H>
void main(void) {
P1 = 0xFF; // Set all pins of Port 1 to high
while(1);
} - Compile the Code: Compile the code to generate the HEX file.
- Upload the Code: Use the programming device to upload the HEX file to the 8051 microcontroller.
Applications of 8051 Microcontroller
The 8051 microcontroller is widely used in various embedded systems applications due to its reliability and ease of use. Some popular applications include:
- Forbrugerelektronik: Remote controls, washing machines, and microwave ovens.
- Automotive: Engine control units, dashboard instrumentation, and security systems.
- Industrial Automation: Process control, data acquisition systems, and robotics.
- Medical Devices: Portable medical instruments, patient monitoring systems, and diagnostic equipment.
Troubleshooting Common Issues
While working with the 8051 microcontroller, you may encounter some common issues. Here are a few troubleshooting tips:
- Connection Problems: Ensure all connections are secure and the programming device is working correctly.
- Power Issues: Verify that the power supply is providing the correct voltage and current.
- Driver Issues: Reinstall or update the drivers if the microcontroller is not recognized by your computer.
- Programming Errors: Double-check your code for syntax errors and ensure the correct target device is selected in the development environment.
Konklusion
The 8051 microcontroller is a powerful and versatile component that has stood the test of time in the embedded systems world. With its rich feature set and ease of use, it remains a popular choice for beginners and experienced developers alike. By following this guide, you should have a solid foundation to start exploring the capabilities of the 8051 microcontroller in your projects.
Click here to make a purchase.
FAQ
Q1: What programming languages can I use with the 8051 microcontroller? A1: The 8051 can be programmed using assembly language or C. Many development environments support both languages.
Q2: How do I reset the 8051 microcontroller? A2: The 8051 can be reset by connecting the RESET pin to a high logic level (usually through a pull-up resistor) momentarily.
Q3: Can I use the 8051 microcontroller for battery-powered projects? A3: Yes, the 8051 can be used in battery-powered projects, but power management techniques should be employed to maximize battery life.
Q4: What is the maximum clock frequency of the 8051 microcontroller? A4: The maximum clock frequency of the standard 8051 microcontroller is 12 MHz, but there are variants that support higher frequencies.
Q5: Are there any modern alternatives to the 8051 microcontroller? A5: Yes, modern alternatives include microcontrollers from the AVR, PIC, and ARM Cortex-M families, which offer more advanced features and higher performance.
